
Cropping a single layer in Photoshop can be a useful tool for editing and enhancing your images. Whether you are looking to remove distracting elements from the background or simply want to focus on a specific part of the image, cropping can help you achieve your desired result.
Before we dive into the process of cropping a single layer in Photoshop, it’s important to understand what a layer is and how it works. In Photoshop, a layer is a separate image or element that can be edited and manipulated independently of the other layers in the document. You can think of a layer like a sheet of transparent film that is stacked on top of each other, with each layer containing its own set of pixels and effects.
Now, let’s take a look at the steps involved in cropping a single layer in Photoshop:
Step 1: Open your image in Photoshop
The first step in cropping a single layer in Photoshop is to open your image in the software. To do this, click on “File” in the top menu bar and select “Open.” Navigate to the location of your image and double-click to open it.
Step 2: Select the Crop Tool
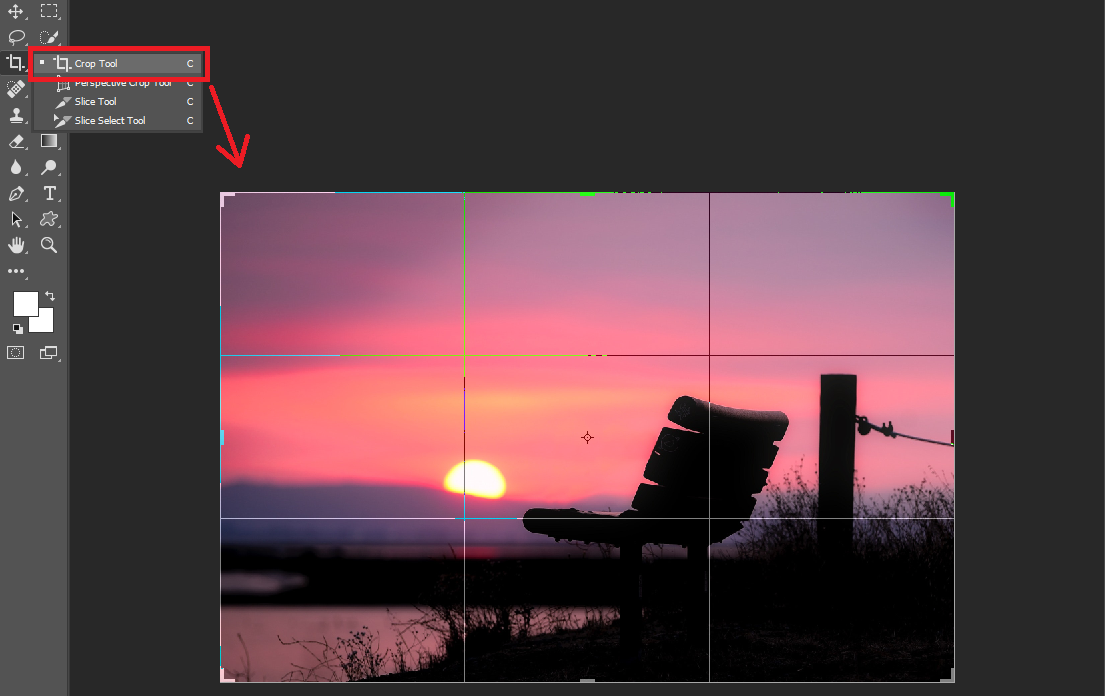
Once your image is open in Photoshop, you will need to select the Crop Tool from the toolbar on the left side of the screen. The Crop Tool is located in the Tools panel, which can be found in the top left corner of the screen.
Step 3: Set the Crop Boundaries
With the Crop Tool selected, click and drag your mouse over the portion of the image you want to keep. This will create a blue outline around the area you have selected. If you need to adjust the size or shape of the crop boundaries, you can do so by clicking and dragging the small squares (called handles) on the corners and edges of the crop outline.
Step 4: Adjust the Cropping Options
Before you complete the crop, you may want to adjust the cropping options to fine-tune your crop. To do this, click on the “Options” button in the top menu bar and select “Crop Options.” This will open a panel with a variety of options for cropping your image.
One of the most useful options in the Crop Options panel is the “Rule of Thirds” grid. This grid divides your image into nine equal sections, with two horizontal and two vertical lines. By aligning your subject with these lines, you can create a more visually appealing composition.
Other options in the Crop Options panel include the ability to change the aspect ratio of the crop, straighten the image, and specify a resolution.
Step 5: Crop the Image
Once you have set your crop boundaries and adjusted the cropping options, you are ready to crop the image. To do this, simply click the “Crop” button in the top menu bar or press the “Enter” key on your keyboard. This will crop the image according to the boundaries you have set and discard any pixels outside of those boundaries.
Step 6: Save the Cropped Image
After you have completed the crop, you will need to save the cropped image to preserve your changes. To do this, click on “File” in the top menu bar and select “Save As.” Give your cropped image a new name and choose a location to save it.
It’s important to note that when you crop a single layer in Photoshop, the pixels outside of the crop boundaries are permanently deleted. This means that you cannot undo the crop once it has been completed
Why doesn’t the crop tool crop layers individually?
The crop tool in image editing software is a powerful and useful tool that allows users to trim and remove unwanted areas of an image. However, one limitation of the crop tool is that it does not allow users to crop individual layers of an image separately. In this article, we will explore the reasons why the crop tool does not function in this way and discuss some potential workarounds that can be used to achieve a similar effect.
First, it’s important to understand how the crop tool works in general. When you use the crop tool, you select an area of an image and then remove everything outside of that area. This process is often referred to as “cropping” the image. In most image editing software, the crop tool works on the entire image, regardless of the number of layers that are present. This means that if you have a multi-layered image and you use the crop tool, all of the layers will be cropped at the same time.
So, why doesn’t the crop tool allow users to crop individual layers separately? There are a few reasons for this. One reason is that the crop tool is designed to work on the entire image, not just individual layers. When you crop an image, you are changing the overall dimensions of the image, and this affects all of the layers in the image. If the crop tool were to allow users to crop individual layers separately, it would be difficult to maintain the relationships between the layers and the overall composition of the image.
Another reason why the crop tool does not allow users to crop individual layers separately is that it can be confusing for users. Imagine if you had a multi-layered image and you wanted to crop one of the layers. If you used the crop tool, you would have to make sure that you only selected the area that you wanted to keep within the layer, rather than the entire image. This could be confusing for users who are not familiar with the way that layers work in image editing software.
So, if you want to crop an individual layer in a multi-layered image, what can you do? There are a few different approaches that you can take. One option is to use the selection tools in your image editing software to select the area of the layer that you want to keep, and then use the delete or cut command to remove the rest of the layer. This will effectively “crop” the layer, but it will not change the overall dimensions of the image.
Another option is to use the masking tools in your image editing software to hide the areas of the layer that you don’t want to keep. This will allow you to retain the full dimensions of the image, but the masked areas will not be visible. This can be a useful approach if you want to preserve the overall composition of the image, but you want to remove certain elements from a specific layer.
In conclusion, the crop tool does not allow users to crop individual layers separately because it is designed to work on the entire image and because it can be confusing for users. However, there are a few different approaches that you can take to achieve a similar effect, such as using the selection or masking tools in your image editing software. By understanding the limitations of the crop tool and learning how to work around them, you can effectively edit your multi-layered images to achieve the desired results.
How does all this relate to cropping a photo in photoshop?
Cropping a photo in Photoshop is a common task that is used to remove unwanted areas of an image and to adjust the composition. The crop tool in Photoshop is a powerful and easy-to-use tool that allows users to quickly and accurately crop their photos. However, it’s important to understand how the crop tool works and how it is related to other features in Photoshop, as this can help you to get the best results when cropping your photos.
First, let’s take a closer look at the crop tool itself. The crop tool is located in the toolbar on the left side of the Photoshop interface, and it is represented by a pair of crossed lines. To use the crop tool, you simply select it and then drag a rectangle over the area of the image that you want to keep. You can adjust the size and shape of the rectangle by dragging the handles on the corners and sides. Once you have selected the area that you want to keep, you can press the “Enter” key to crop the image.
One thing to keep in mind when using the crop tool is that it is non-destructive, which means that it does not permanently alter the original image. Instead, it creates a new version of the image that is cropped to the dimensions of the rectangle that you selected. This is useful because it allows you to undo the crop if you are not satisfied with the results. To undo the crop, you can simply select the “Undo” command from the “Edit” menu or use the “Ctrl + Z” keyboard shortcut.
Another important aspect of the crop tool is that it allows you to work with different aspect ratios. An aspect ratio is the ratio of the width of an image to its height, and it is often expressed as a set of numbers, such as 3:2 or 16:9. The crop tool in Photoshop allows you to choose a specific aspect ratio or to enter your own custom ratio. This is useful because it allows you to crop the image to a specific size or shape, such as a 4×6 inch print or a widescreen format.
So, how does all this relate to cropping a photo in Photoshop? Well, understanding the features and capabilities of the crop tool will allow you to effectively crop your photos to achieve the desired results. Whether you want to remove unwanted areas of an image, adjust the composition, or work with different aspect ratios, the crop tool is a powerful and versatile tool that can help you to get the job done. By learning how to use the crop tool and experimenting with different settings and options, you can create beautifully cropped photos that are ready for printing or sharing online.
1. The Marquee Tool (The primary cropping method)
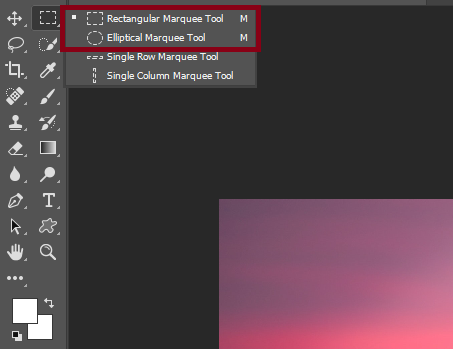
The Marquee Tool is a necessary selection tool in Photoshop that allows to approves you to draw out a selection. There are two options to select you to have with the Marquee Tool is the Rectangular Marquee and the Elliptical Marquee. You can easily access either of these drawing tools by pressing M or searching it at the front of your toolbar. Click and hold on the Marquee Tool icon to show the other device/tool options.
The way this tool works is straightforward. Click everywhere on your image and drag out to make a selection. In this case, I desire to crop the layer into a rectangular shape so that I will create a square collection.
(Note: while keeping down your mouse, control the space bar to move around your complete selection. This will make life a lot easier and less complicated to refine your closing crop.)
You’ll now notice to appear a black and white line on your image. These are referred to as marching ants, and they characterize your selection.
If you’re feeling unhappy with the choice or selection and choose to begin over, press Command D (Mac) or Control D (PC) to deselect. Once completely happy with your selection, continue to move on!
Go to your layers panel and choose the layer what are you want to crop. Remember, it will be cropped based totally on the shape of your current Marquee selection.
Now you can see two options.
The first option is to crop the layer using deleting the excess. This will make your changes permanent, and you cannot go lower back and refine this later.
The 2d option is to create a layer mask to mask out the extra and crop the layer. This choice can be refined later if you sense like you made a mistake.
I would recommend using a layer mask. However, I’ll share how to do both so you can select!

Cropping A layer with the delete method
Select the layer you want to crop and make sure that your Marquee Selection is how you prefer it.
Use the keyboard shortcut Command Shift I (Mac) or Control Shift I (PC) to invert your selection. This will now select the whole part outside of your initially Marquee selection.
Next, press the delete key.
Everything backyard of your Marquee resolution will be deleted. Press Command D (Mac) or Control D (PC) to deselect.
Now you have successfully cropped a layer in Photoshop with merely a few clicks! Keep in thought that this approach is permanent, and you can’t alter your crop later.
For a much less permanent cropping option, try the next method or technique!
Cropping A Layer with the Layer Mask Method
Choose the layer you desire to crop and double-check that your Marquee Selection is positioned how you want.
With your selection active, click on the layer mask icon at the bottom of your layers panel. This can automatically apply your choice to a layer mask. Everything outside of the decision has disappeared, and you’re left with an ideal crop of your layer. A layer mask will now be seen beside your cropped coat. If you don’t already understand, here’s how layer masks work:
Everything black on your masks is 100% completely transparent, while something white is a hundred percent visible. Any color of gray in between will represent unique transparency values between black and white. This capability that although it looks as if components of your layer have been ‘deleted,’ they are genuinely hidden. If you had been to use a white brush and paint over the black sections of your layer mask, your picture would become visible.
I made a video explaining how layer masks work that you can locate here.

Result:
You’ve now successfully learned about how to crop a layer in Photoshop with this Marquee Tool. This is one of the easiest ways for cropping layers; however, it is limited via the shapes you can crop.
Fortunately, the further two strategies will share how to clear up with this problem!
2. The Pen Tool (Customizable layer cropping)
The Pen Tool in Photoshop takes matters one step further by getting more sophisticated with your layers crop. This tool lets you create a customized selection merely is about any shape you can imagine the use of anchor points.
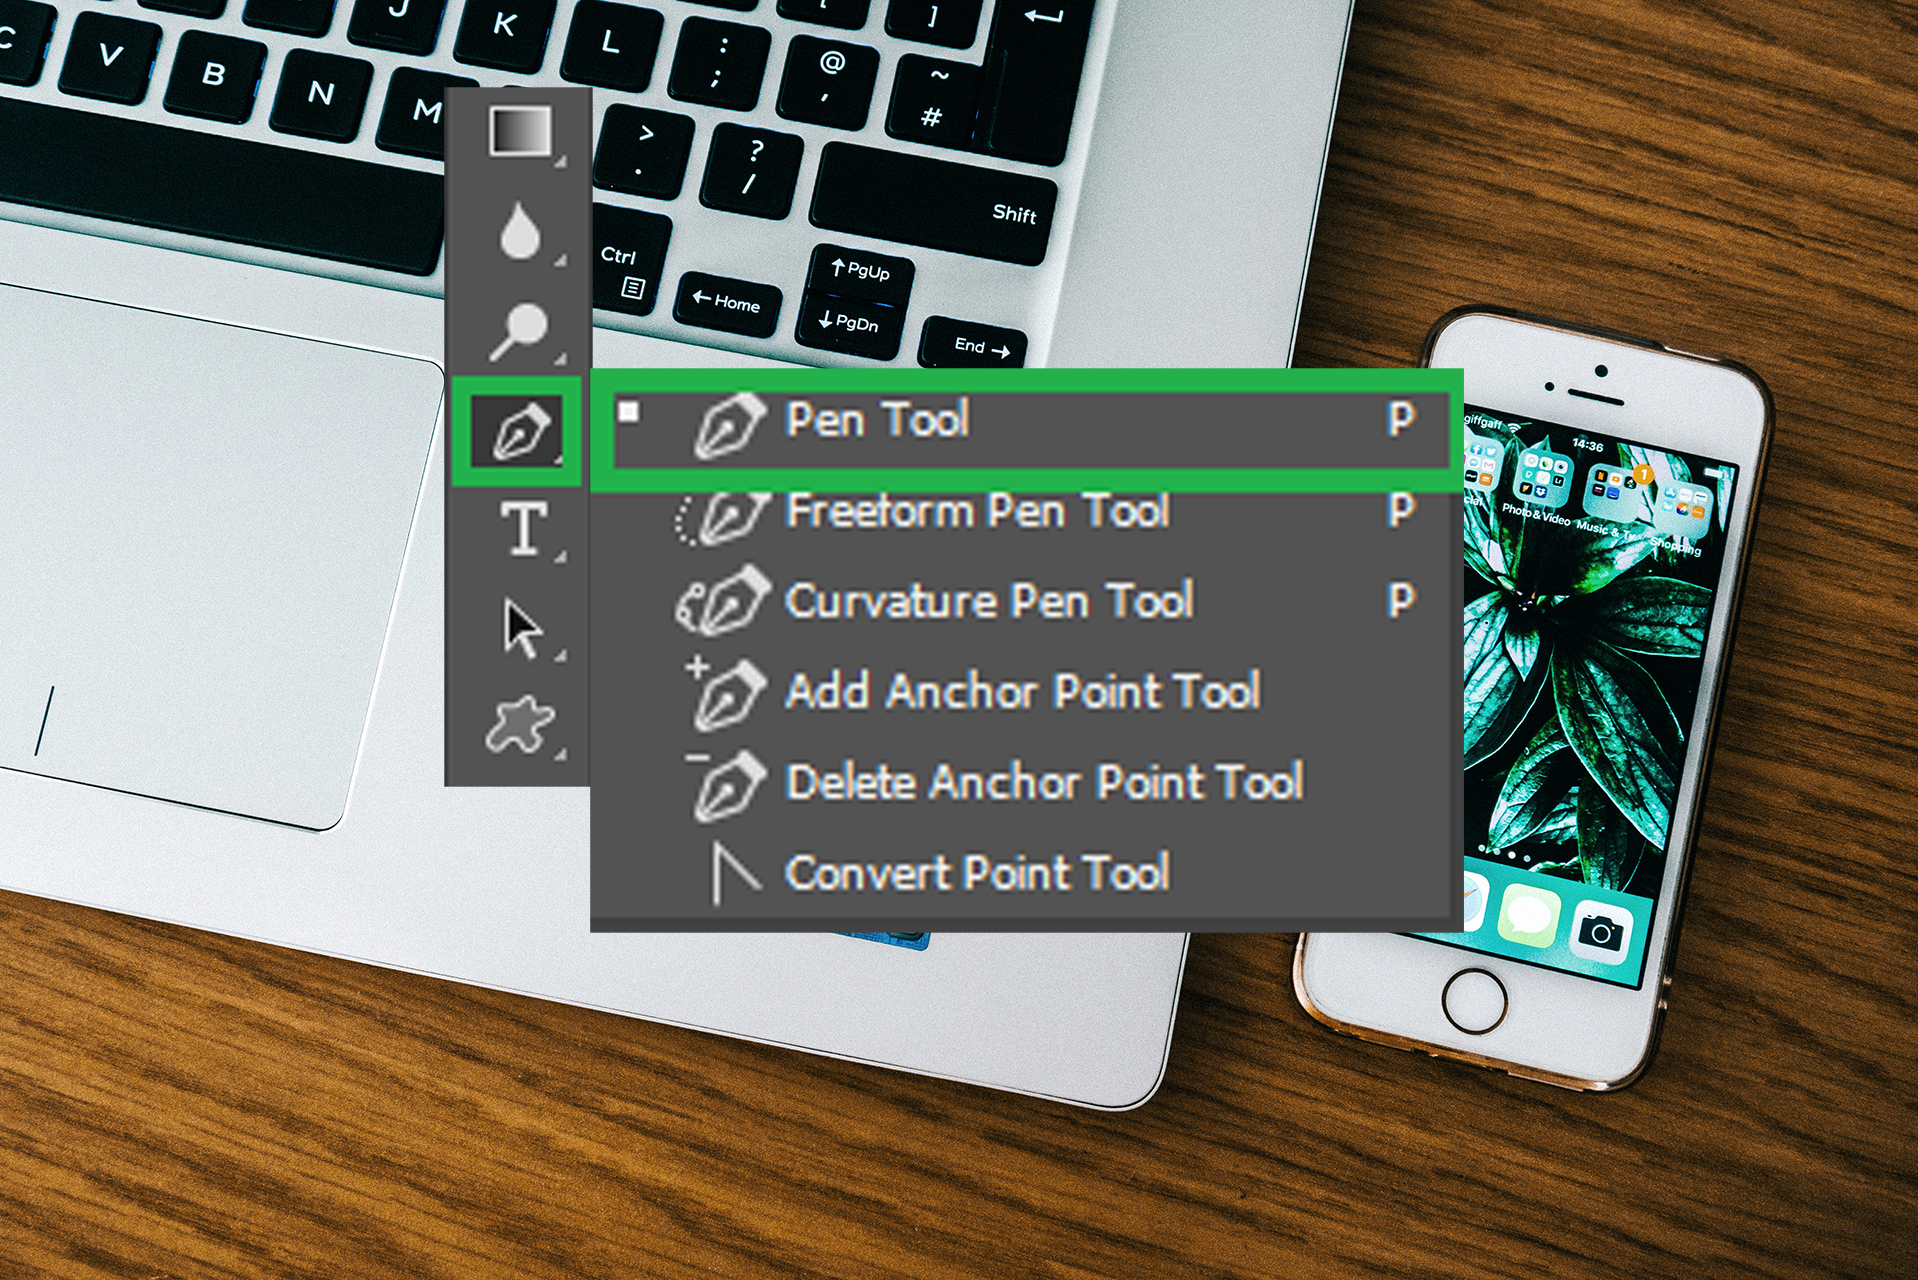
To access the Pen Tool, press P or get entry to it in your toolbar. When you select anywhere on your image, a small square will appear. This is known as an anchor point. As you continue to click, you create more anchor points, every related by way of little lines. These lines all connected to form a pen path, but suppose of it as your choice for the crop.
If you need to curve your pen direction around an edge, click and drag it when you create a new anchor point. You can also reposition any anchor factor using preserving Command (Mac) or Control (PC) and clicking on the preferred anchor point.
To help construct your skills, make positive to read my information to the Pen Tool to start feeling extra confident!
Once you’ve created the shape, join your pen route lower back to the beginning point.
Now that your path has been growing to become a selection, highlight the layer you prefer to crop in your layers panel. Once again, you can pick out between the delete or layer masks method.
Suppose you want to ignore this method, press Command Shift I (Mac) or Control Shift I (PC) to invert your selection. Press the delete key to crop the layer. For the layer mask method, click on the layer masks icon at the backside of your layers panel. A layer mask will be added, and your photograph will be cropped. You can adjust these masks later at any time!

Result:
Using the Pen Tool to crop a layer in Photoshop is any other superb technique if you favor creating custom shapes. Since you can manually hint out the exact crop you want, the selections are limitless with this tool!
3. The shape tool (Cropping a layer into a specific shape)
In the remaining two methods, you learned a simple way to crop a thickness and a more customized way with the Pen Tool. So what about if you can select to crop your image into a very particular shape? And if you’re like me, you aren’t naturally gifted at hand drawing shapes. Fortunately, you can crop a layer into a form using the Shape Tool!
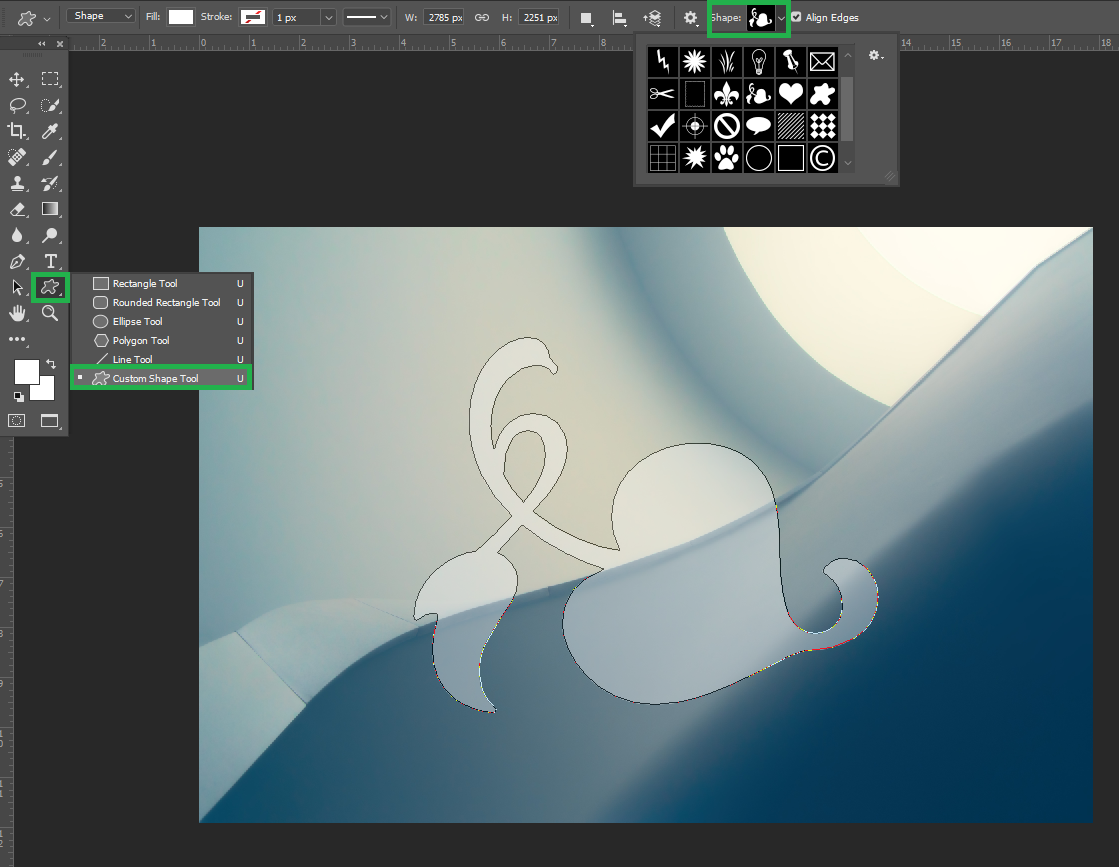
Access the shape tool by pressing U or pick it out in your toolbar. In this example, I will prefer to crop the layer into the form of a flower.
To make lifestyles easy, I’ll pick the custom shape tool and pick out a flower from the preset shape options. No depend on which structure you decide to use, the further steps remain the identical Click and drag out the shape onto your canvas. A new shape layer will be created. Hold Command (Mac) or Control (PC) and click on on your shape layer thumbnail. This will flip your shape into a selection.
It will be Highlight the layer you favor to crop in your layers panel. Now select whether you want to crop the layer with the delete method, or layer masks method.
Suppose you have ignored this method, press Command Shift I (Mac) or Control Shift I (PC), to invert your selection. Press the Delete Key to crop the layer into the shape. For the layer masks method, click on the layer mask icon at the backside of your layers panel. The new layer masks will have have a white define of your shape. After you’ve accomplished either of methods, click on your shape layer & press delete to get rid of the sheet. Now you’ll have an ideal layer crop that suits the shape!

Result:
Suppose you are Using the Shape Tool to crop a layer in Photoshop, one of the most underrated methods. Most users don’t think of using the Shape Tool to make selections, but it’s an on-hand tool. With this technique or practice, you can crop a layer into any form with ease!
how to crop in photoshop?
In this article, I’m going to show you how to crop in Photoshop, the basic tool and feature. This has been filmed in the Photoshop Quick Tip series, which is part of Ben Willmore’s comprehensive tutorial, Adobe Photoshop CS6: The Ultimate Collection, watch the accompanying video tutorial below and learn how crop in Photoshop:
how to crop an image in photoshop?
How to crop an image in Photoshop is not a hard question to answer but can be a bit tricky to master. You will need to learn some tricks and tips about how to crop an image and I’ll show you some of my favorites.
how to crop a layer in photoshop?
How to crop a layer in Photoshop is a skill that many people do not think about or know they have. If you are one of those people who are not familiar with it, here is a quick guide on what to do to crop your layer and make it appear as if it was removed from the image. This skill can be used in so many different situations as there are so many different layers in Photoshop.
how to crop one layer in photoshop?
Want to know how to crop one layer in Photoshop? You can learn how to crop a layer using a simple process that anyone can do. Here is an easy step-by-step process on how to crop a layer in Photoshop – you’ll be able to crop any layer in Photoshop.
crop a layer in photoshop?
Many of the top photographers around the world are using crop a layer in Photoshop so that they can get that perfect image of their subject. The truth is that crop a layer in Photoshop isn’t actually that hard, but it does require some practice and experience to really know what you are doing. Here are some easy ways on how to crop a layer in Photoshop so you can get the best possible photo of your subject.
how to select a layer in photoshop?
How to select a layer in Photoshop is one of the most important things you will ever learn. This is especially true if you are a photographer and want to edit any of your photographs before you print them. It is imperative that you learn how to select a layer in Photoshop if you do not want any mistakes made when you save the image.


